Showing posts with label dessert. Show all posts

Tuesday, January 10, 2012

Warm Chocolate Melting Cake

[This post was contributed by Jolene's brother, John. ]

In honor of Jolene joining the ranks of the gainfully employed, we prepared her a celebratory dinner culminating in (what else?) a delicious chocolatey dessert.


Katherine and I have been on two cruises and both of them featured this decadent dessert, infamously known as the "Warm Chocolate Melting Cake".  At dinner every night the waiter would come by with his menu full of delightful new treats, and Katherine would patiently wait for the rest of us to figure out what we wanted.  But she already KNEW what she was going to get - one of the few items on the menu every single night - the Warm Chocolate Melting Cake. 


Served in a ramekin and dusted with powdered sugar, the unassuming exterior hid a sinfully gooey center.  I swear there were times when she snuck one in at the breakfast buffet, tracked one down at lunch, and had one or TWO at dinner.  You know what they say about calories when you're out of the country - they don't count!

Following is a recipe allegedly scaled down from Carnival's actual onboard chef's manual.  The original recipe called for 50 lbs of chocolate and 500 eggs!  My variation neglects the powdered sugar, and turns the cakes out of the ramekin for a little different presentation.  We made half of the recipe listed below, but the full recipe will make 6 individual 4oz ramekins.


Ingredients:
  • 8 oz dark chocolate (or you can substitute 1 1/3 cups semi-sweet chips)
  • 8 oz butter (2 sticks)
  • 5 eggs
  • 5/8 cup sugar
  • 2/3 cup all purpose flour


Directions:
1.  Preheat oven to 375.
2.  Melt chocolate and butter together over low heat.  We did it the gangster way, in a dinged up old metal measuring cup straight on the stove, but you can use a double boiler or a microwave if you prefer.  To use the microwave, simply chop everything up into manageable chunks and put it in a bowl.  Microwave for 20 seconds on high, then take it out and stir.  Microwave it for 20 more seconds, and continue the cycle until the butter and chocolate have fully melted.  Set the mixture aside to cool.


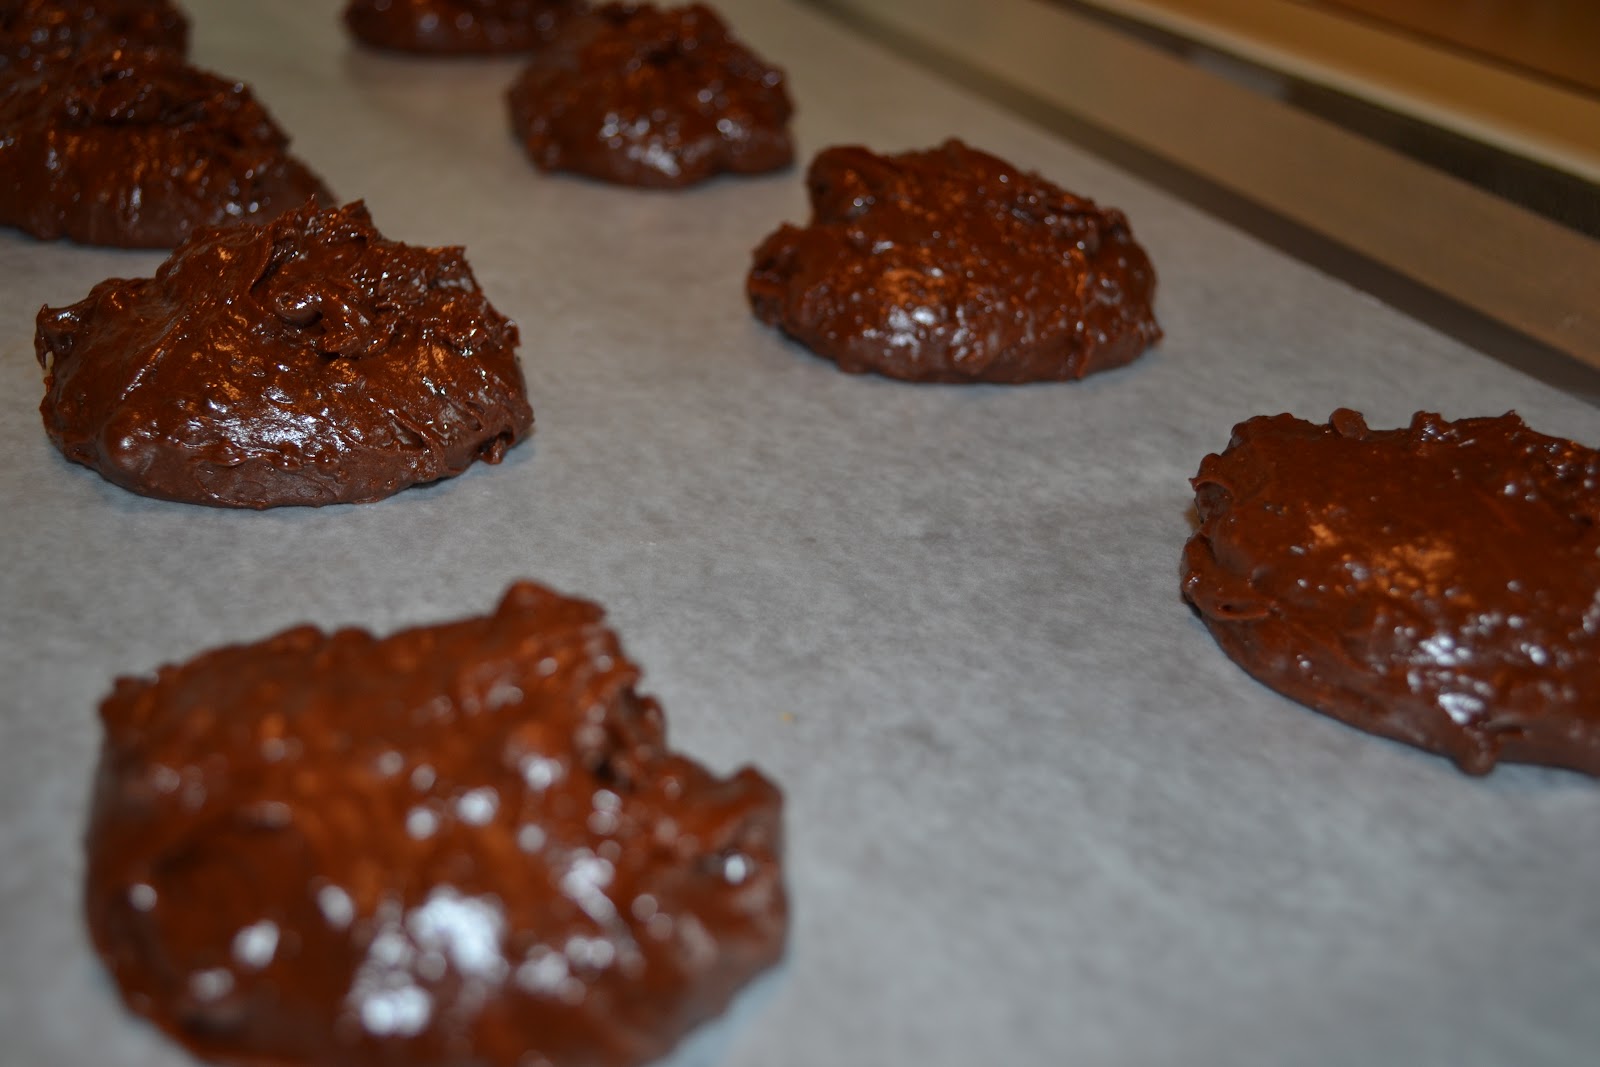
3.  In a separate bowl, beat the eggs and then add the sugar.  Mix well, and then add the flour.  Again mix well until you have a nice goopy texture, like you can see in the picture.  We don't want any lumps!


4.  Slowly add the relatively cooled chocolate to the egg mixture, stirring constantly.  You'll want to make sure the chocolate is cool enough to not cook the eggs on contact, but it's best to add the chocolate slowly just to make sure.


 5.  Take your ramekins and coat with cooking spray/crisco/butter.  Wipe out the excess, then dust the dishes with flour so the finished cakes will come out nice and easy.  I like to dust with cocoa powder instead since it's brown, but honestly flour is just as good.

6.  Fill ramekins roughly 3/4 of the way, leaving some room for the cake to expand while baking.


7.  Bake for 12-15 minutes, depending on the size of your ramekins and the texture you like.  Consistency will vary from hot fudge sauce to heavy pudding.  As every oven and ramekin is different, the only good way to tell when it's done to your liking is to open the oven and jiggle it.  Depending on how jiggly the center still is, with a little experience you can tell if it's ready.  For reference these cakes were firm and unmoving in the outer half inch around the edge but fairly jiggly in the middle.


8.  Let them cool for a few minutes, then carefully run a butter knife around the edge to separate the cake from the ramekin.  Invert the plate on top of the ramekin, then turn the whole thing upside down.  Gently tap the ramekin's bottom to get the underside of the cake to separate as well.  Carefully lift the ramekin off of the cake. 


9.  Serve with vanilla ice cream, and go to work!

Wednesday, November 23, 2011

Pumpkin Apple Butter Pie

I'm not going to lie. This pie is kind of a big deal. I've always been lukewarm in regards to plain old pumpkin pie... but this takes it up a notch without offending any pie traditionalists.
 

Ingredients
  • 1 cup pumpkin puree
  • 1 cup apple butter
  • 3/4 c hazelnut coffee creamer
  • 2 eggs
  • 1 t cinnamon
  • 1/2 t nutmeg
  • 1 pie crust


Directions

1. Preheat oven to 425 F. Combine pumpkin, apple, creamer, eggs, cinnamon, and nutmeg in a bowl. 
2. Line a pie dish with a pie crust, fold the edges under and press into a scalloped pattern.


3. Pour filling into pie and bake for 15 minutes at 425. Then reduce the heat and bake at 350 F for  30-40 minutes, until a toothpick inserted into the center comes out clean.

Monday, October 31, 2011

Pumpkin Cookies with Cream Cheese Filling

These were fun to make and I have it on good authority that bite-sized cookies are healthier for you ;)


Ingredients:
  • 2 1/2 cups all-purpose flour
  • 1 teaspoon baking powder
  • 1/2 teaspoon baking soda
  • 1/4 teaspoon salt
  • 2 teaspoons ground cinnamon
  • 1/2 teaspoon nutmeg
  • 4 ounces butter, softened
  • 3/4 cup packed light brown sugar
  • 3/4 cup granulated sugar
  • 2 large eggs
  • 1 teaspoon vanilla
  • 1/2 cup evaporated milk
  • 3/4 cup canned pumpkin
  • 1 can cream cheese frosting

Directions:
1. Lightly rub a dollop of oil onto your baking sheets with a paper towel. Heat oven to 350°.
2. In a bowl, combine flour, baking powder, soda, salt, cinnamon, and nutmeg.
3. In a large mixing bowl with electric mixer, beat 4 ounces butter, 1/2 cup brown sugar, and 1 cup granulated sugar until light and fluffy. Beat in the eggs and vanilla until well blended. Slowly beat in the milk and pumpkin, then add dry ingredients, beating just until blended.

4. With a pastry bag (or ziploc freezer bag), pipe the dough into silver dollar sized circles onto the prepared baking sheets.


5. Bake for 10 minutes, or until tops are firm. Cool for about 5 minutes on the baking sheet then loosen the bottoms with a spatula and let them cool completely.

 
6. Lay the cookies out upside down and pipe frosting onto each one about 1/2 inch from the edge of the cookies. Then gently push the bottom of another cookie down onto the frosting until the frosting just barely comes over the edges.


7. Refrigerate for 10-15 minutes so that the icing sets up. Serve room temp or cold. 

Sunday, September 25, 2011

French Apple Tart

I’m in a cooking club at work and our challenge this month was to make something French. I’ve always been intimated by French recipes, but I thought I could handle a (relatively) simple dessert.

And voila! French apple tart made in about two and a half hours.

I adapted this recipe. God bless Ina Garten.

http://www.foodnetwork.com/recipes/ina-garten/french-apple-tart-recipe/index.html

Ingredients


For the pastry:

2 cups all-purpose flour

1/2 teaspoon kosher salt

1 tablespoon sugar

12 tablespoons (11/2 sticks) cold unsalted butter, diced

1/2 cup ice water

For the apples:

3-4 Granny Smith apples

¼ to 1/2 cup sugar

4 tablespoons (1/2 stick) cold unsalted butter, small diced

1/2 cup apricot jelly or jam

2 tablespoons rum or water


Make the pastry first.

1. Place flour, salt and sugar in a bowl, mix. If you have a large food processor, like Ina’s recipe says, follow her from here on out. If you don’t, follow me. :)

2. Dice the butter as tiny as you can without it melting on you. Combine with dry mixture.

3. Mush together and get the butter into as tiny pieces as possible. A fork is best, combined with your hands. Move quickly though, as you don’t want the butter to completely melt.

4. Slowly add ice water. Do not over mix.

5. Place on floured surface, meld into a ball.

6. Place in plastic wrap and let sit in the fridge for about an hour.

An hour later …

1. Preheat the oven to 400 degrees F. Line a sheet pan with parchment paper.

2. On a floured surface, roll out the dough. Feel free to add more flour to the mixture if necessary to make the right shape.

3. I made mine into a rectangle, but feel free to make it into a circle or whatever shape you want.

4. Place on parchment-paper baking sheet. Quickly place in fridge.


Apple time ….

1. Peel the apples, cut them in half through the stem.

2. Remove the stems and cores with a sharp knife and a melon baler. Be careful – this can get a bit dicey.

3. Slice the apples crosswise in about 1/4-inch thick slices.

4. Take your pastry out of the fridge and lay the apples on top. I started in one corner, went diagonal to the other corner and made a cross. But do whatever you think looks pretty.

5. Sprinkle with sugar.

6. Dice your remaining butter and sprinkle across the tart.

7. Bake for 45 minutes to one hour. You want it to the browned. Ina recommends rotating the pan once during cooking. She also says … “If the pastry puffs up in one area, cut a little slit with a knife to let the air out. Don't worry! The apple juices will burn in the pan but the tart will be fine!” How reassuring. :)

8. Once your tart is done, heat the apricot jelly together with the rum or water and brush the apples and the pastry completely with the mixture. Lightly loosen the tart with a spatula so it doesn't stick to the paper.

9. Allow to cool. Serve either warm or at room temperature.

Sunday, July 31, 2011

Double Chocolate Espresso Cookies

Katherine (my sister-in-law) and I took on this one of Giada's recipes last week. The name is kind of inaccurate, because there are not two but FOUR types of chocolate in one delicious little cookie. Count em... FOUR!


It may seem like overkill with the photos in this post- and that's because Katherine let me play with her awesome camera!
As with any gourmet cooking, it's important to have good sous chefs and assistants to keep things running smoothly... Introducing my adorable niece, Kayla, and niece dog, Snickers.
KJ- Quality control, taste testing


Ok... now that I'm done shamelessly flaunting how cute my family is, we can get down to real business: How to pack as many forms of chocolate into one cookie.

Prep Time: 15 min
Cook Time: 19 min
Makes: 10-12 large cookies


  • Ingredients:
    • 6 ounces semi-sweet chocolate, chopped into 1/2-inch pieces (recommended: Ghirardelli)
    • 2 tablespoons unsalted butter, at room temperature
    • 1/3 cup dark chocolate-covered espresso beans
    • 1 cup flour
    • 2 tablespoons unsweetened cocoa powder
    • 1 teaspoon baking powder
    • 1/4 teaspoon fine sea salt
    • 3/4 cup sugar
    • 2 eggs, at room temperature
    • 2 tablespoons water
    • 1 teaspoon pure vanilla extract
    • 1 cup semi-sweet chocolate chips (recommended: Nestle Toll House)
     
  • Directions: 
  •  Place an oven rack in the center of the oven. Preheat the oven to 300 degrees F. Line 2 baking sheets with parchment paper or silicone mats. Set aside.

  • In a small bowl, combine the chocolate and butter. Place the bowl over a pan of barely simmering water and stir occasionally until the chocolate has melted and the mixture is smooth. 


    In the bowl of a food processor, finely chop the chocolate covered espresso beans. In a medium bowl, whisk together the chopped espresso beans, flour, cocoa powder, baking powder, and salt. 


    In another medium bowl, whisk together the sugar, eggs, water, and vanilla extract. Gradually add the dry ingredients and stir until thick and smooth. 


    Fold in the melted chocolate. Stir in the chocolate chips. 


    Using a cookie or ice cream scoop, scoop level 1/4 cupfuls of the batter onto the prepared baking sheets. 


    Bake until slightly puffed and the tops begin to crack, 18 to 20 minutes. Allow the cookies to cool completely on the baking sheets and serve. 


Wednesday, July 20, 2011

German Chocolate Cake (from scratch, because my brother and sister in law are too good to me!)

My brother, John, and sister-in-law, Katherine, came in first place in my heart with my best birthday present this year! Obviously the girl who has everything needs a gift that's edible! German Chocolate cake is my fav, and I don't think I've ever had one this good!

Notes From John and Katherine:

"-I have found a great and delicious way to use the extra coconut/pecan icing leftovers is to pair them with some chocolate crepes :) yummo!
-some recipes called for the coconut icing on the sides as well as top and in between slices, up to the cook's preference.
-the amount of batter was enough for 3 thinner layers in a 9" pan.... recipe called for 2 layers, but we like the taste and look of the 3 layers (the more of that magic icing you can cram in the cake the better, my opinion!)....
-we added a cup of mini choc chips to the batter"


Here's the recipe they used from foodnetwork.com: German Chocolate Cake

It goes a little somethin like this:

German Chocolate Cake 

Recipe courtesy Aliyyah Baylor


Prep Time: 40 min
Inactive Prep Time: 2 hr 15 min
Cook Time: 1 hr 50 min
Level: Intermediate
Serves: 2 (9-inch) layer cakes or 24 cupcakes

Ingredients

  • 4 ounces baker's chocolate (recommend: Baker's German Sweet Chocolate)
  • 1/2 cup water
  • 2 cups cake flour
  • 1 teaspoon baking soda
  • 1/2 teaspoon salt
  • 1/2 pound unsalted butter, room temperature
  • 1 teaspoon pure vanilla extract
  • 1 1/2 cups granulated sugar
  • 1/2 cup brown sugar
  • 4 eggs, separated
  • 1 cup buttermilk
  • Filling, recipe follows or whatever you prefer
  • Favorite chocolate frosting, for the sides

Directions

1. In a microwave safe bowl, add the chocolate and water and heat in a microwave or over a double boiler until melted. Stir until smooth and set aside. In a separate bowl, sift together the cake flour, baking soda and salt. Set aside.
2Preheat the oven to 350 degrees F.
In the bowl of a stand mixer, cream together the butter, vanilla extract, granulated sugar and brown sugar until light and fluffy. Scrape down the sides of the bowl. Add egg yolks 1 at a time, beating well after each addition. Blend in the melted chocolate. Add the flour mixture and buttermilk, alternating, until just combined.
3. Add the egg whites to a small bowl and beat with an egg beater until stiff peaks form. Gently fold the whites into the batter until well incorporated.
4. Pour the batter evenly into 2 (9-inch) cake pans or 2 (12 capacity) cupcake tins. Bake until a toothpick inserted into the center of the cake comes out clean, about 30 minutes for the larger cakes and 15 to 20 for the cupcakes. 5. Remove from the oven to a cooling rack and allow to cool completely before filling and frosting.
6. To Assemble the German Chocolate Cake:
  • Put a cake layer on top of a serving plate and top with a generous layer of the caramel/pecan filling. Cover the frosting with another cake layer of and spread with the frosting. Top with the final layer and frost.
7. Spread dark chocolate frosting (secret recipe), or your favorite chocolate frosting around the outside of the entire cake. Cut into wedges and serve.


__________________________________________________________________

Coconut Pecan Filling:

  • 1 1/2 cups evaporated milk
  • 5 egg yolks, slightly beaten
  • 1 cup granulated sugar
  • 1 cup brown sugar
  • 2 teaspoons vanilla extract
  • 1 cup butter
  • 2 1/2 cups flaked coconut
  • 2 cups toasted pecans

1. Combine the evaporated milk, slightly beaten egg yolks, granulated sugar, brown sugar, vanilla and butter in a large saucepan or heavy pot over low heat. When the butter melts raise the heat to medium, stirring constantly. 2. The mixture will thicken after 10 to 12 minutes. Remove from the heat. Add the coconut and pecans and cool before frosting the cakes.


Sunday, July 10, 2011

Gulab Jamun

This is one of my favorite Indian sweets. It's a really simple dish, and it's something different that most palates will still find to be agreeable.

Ingredients: (makes about 25 gulab jamun)

For the dough balls-
  • 3 c powdered milk
  • 3/4 c all purpose flour
  • 1 t baking soda
  • 1/2 c milk
  • oil for frying
For the syrup-
  • 2 c sugar
  • 1 stick cinnamon
  • 3 pods cardamom
  • 1 T all spice pods
  • 1 c water

Directions:
1. Combine all of the syrup ingredients in a pan over medium heat. Stir until sugar is dissolved. Set aside on the stove top to keep it warm.
2. Combine dry ingredients for dough balls and mix thoroughly.
3. Add the milk 1 T at a time and mix after each. Stop adding milk when you have a dough ball.
4. Break off the dough in little hunks about 1 T each (smaller than a ping pong ball. I'd say the size of a sea turtle egg... lol). Roll each hunk into a ball in the palms of your hands. Note: don't just form it into a ball, you have to roll it in circles your palms so that it stays together when you fry it.
Note the size of the balls in relation to a ping pong ball.
5. Heat a pan with enough oil to cover the dough balls on high heat. Reduce the heat to medium and drop each dough ball in. Don't agitate them while they're still stuck to the bottom. Once they start to float up a little and roll over, agitate the pan so that the balls roll and brown evenly.
6. Let the balls brown for 5 minutes until they're dark brown. (See picture)
7. Remove from oil and put directly into syrup.


8. For best results, let the dough balls sit in syrup over night in the refrigerator. I serve them still sitting in the syrup, but you can remove them and put them into little cupcake papers.