Sunday, July 31, 2011

Double Chocolate Espresso Cookies

Katherine (my sister-in-law) and I took on this one of Giada's recipes last week. The name is kind of inaccurate, because there are not two but FOUR types of chocolate in one delicious little cookie. Count em... FOUR!


It may seem like overkill with the photos in this post- and that's because Katherine let me play with her awesome camera!
As with any gourmet cooking, it's important to have good sous chefs and assistants to keep things running smoothly... Introducing my adorable niece, Kayla, and niece dog, Snickers.
KJ- Quality control, taste testing


Ok... now that I'm done shamelessly flaunting how cute my family is, we can get down to real business: How to pack as many forms of chocolate into one cookie.

Prep Time: 15 min
Cook Time: 19 min
Makes: 10-12 large cookies


  • Ingredients:
    • 6 ounces semi-sweet chocolate, chopped into 1/2-inch pieces (recommended: Ghirardelli)
    • 2 tablespoons unsalted butter, at room temperature
    • 1/3 cup dark chocolate-covered espresso beans
    • 1 cup flour
    • 2 tablespoons unsweetened cocoa powder
    • 1 teaspoon baking powder
    • 1/4 teaspoon fine sea salt
    • 3/4 cup sugar
    • 2 eggs, at room temperature
    • 2 tablespoons water
    • 1 teaspoon pure vanilla extract
    • 1 cup semi-sweet chocolate chips (recommended: Nestle Toll House)
     
  • Directions: 
  •  Place an oven rack in the center of the oven. Preheat the oven to 300 degrees F. Line 2 baking sheets with parchment paper or silicone mats. Set aside.

  • In a small bowl, combine the chocolate and butter. Place the bowl over a pan of barely simmering water and stir occasionally until the chocolate has melted and the mixture is smooth. 


    In the bowl of a food processor, finely chop the chocolate covered espresso beans. In a medium bowl, whisk together the chopped espresso beans, flour, cocoa powder, baking powder, and salt. 


    In another medium bowl, whisk together the sugar, eggs, water, and vanilla extract. Gradually add the dry ingredients and stir until thick and smooth. 


    Fold in the melted chocolate. Stir in the chocolate chips. 


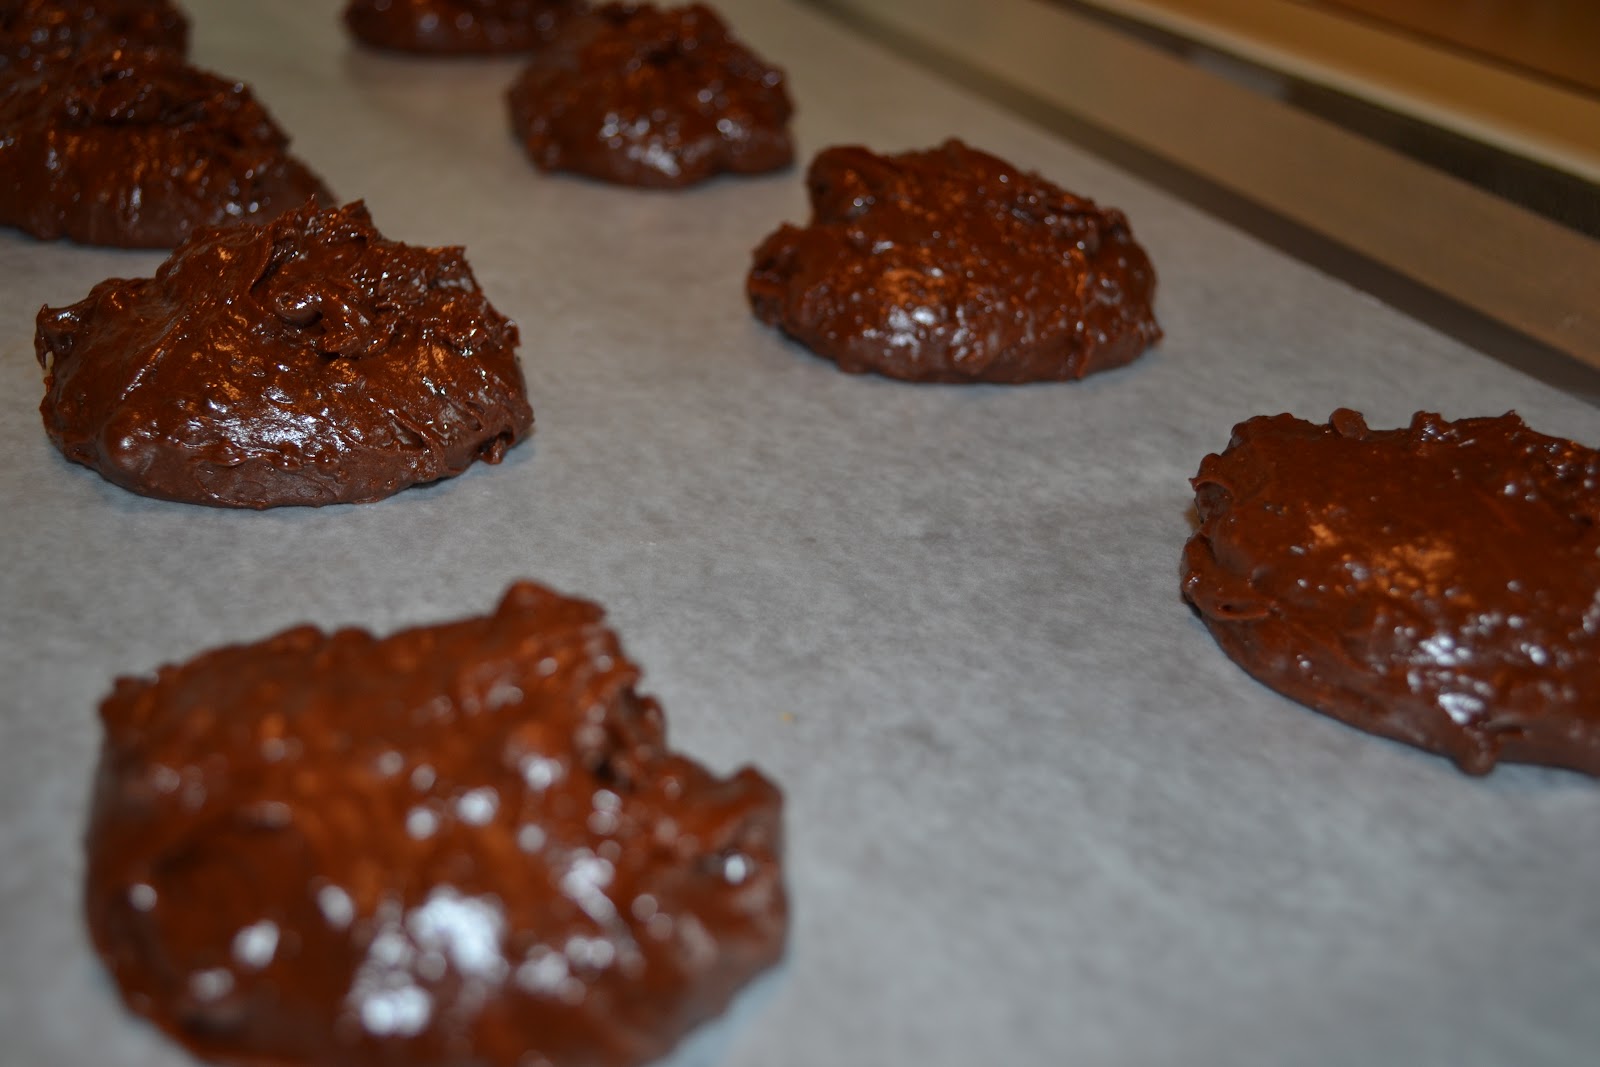
    Using a cookie or ice cream scoop, scoop level 1/4 cupfuls of the batter onto the prepared baking sheets. 


    Bake until slightly puffed and the tops begin to crack, 18 to 20 minutes. Allow the cookies to cool completely on the baking sheets and serve. 


Thursday, July 28, 2011

Summer Squash Soup, Roasted Tomato and Cipollini

I think that dinner tonight may have been the highlight of my Goodies and Grub experience thus far. I'm so happy to have been blogging for a couple months because it's been opening so many doors (or cupboards) in the kitchen! 


Both of these recipes come from The Smitten Kitchen; they were such a perfect compliment to one another. I'm calling the combination of bold tomatoes and onions with subtle, comforting summer squash soup "Summer Lovin'." What an essential summer garden supper!

I'll stop with the veggie love story and get on to the how-to's...


Veggie mania
Squash Soup Ingredients:
  • 1/2 stick (4 tablespoons) unsalted butter, cut into pieces
  • 1 medium onion, chopped
  • 1/2 teaspoon salt
  • 2 lb yellow summer squash, halved and thinly sliced
  • 2 carrots, thinly sliced
  • 1 yellow-fleshed potato (1/2 pound), peeled, halved, and thinly sliced
  • 4 cups chicken stock or reduced-sodium chicken broth
Directions:

    1. Melt butter in a 6- to 8-quart wide heavy pot over moderate heat, then cook onion with salt, stirring, until softened, about 8 minutes. 

    2. Add squash, carrots, potato, and stock and bring to a boil. 

    3. Reduce heat, then simmer, partially covered, until vegetables are very tender, about 20 minutes. 


    4. Remove from heat and cool soup, uncovered, 10 minutes.

    5. Working in batches, puree; soup in a blender until smooth (use caution when blending hot liquids) and transfer to a bowl. 

    6. Return purée to cleaned pot and thin with water if desired; simmer 3 minutes. Season with salt.  


    ___________________________________________


    Roasted Tomato and Cipollini Ingredients:
    • 1 pound cipollini onions
    • 1 pound small Roma or large cherry tomatoes1/4 cup olive oil
    • Coarse salt
    • 4 slices of country or ciabatta bread, one-inch thick
    • Garlic clove (optional)
    • Few fresh basil leaves, slivered 
    • 1/2 c ricotta cheese/spinach mixture (optional)


      Directions: 
      1. Preheat oven to 375°F. Boil a small pot of water and blanche the cipollini for 10 seconds, then plunge them into cold water. Use a paring knife to make a small slit in each, and slide them out of their skins and outer layer. 

      2. Spread peeled onions and tomatoes in a roasting pan. Drizzle with olive oil and a few good pinches of coarse salt. Toss everything together until well-coated and roast in preheated oven for about 45 minutes, reaching in every 15 minutes with a spatula to roll the tomatoes and onions around to ensure all sides get blistered. 


      Fuhgetaboutit!
      3. Just before you take the tomatoes and onions out, place your bread slices on the oven rack and let them toast lightly. You can rub the toasts with a halved garlic clove while still hot.   


      4. Use tongs to arrange toasts in one layer on a serving platter.


      5. I had some leftover spinach/ricotta mixture from stuffed chicken earlier in the week, so I spread some of that onto the toast. Then top the toast with tomato and onions, don't hesitate to pour some of the hard work of the tomato and onion onto the toast. 

      6. Sprinkle the dish with the basil and eat at once. 


    Wednesday, July 27, 2011

    Stacey's Polish Pasta (or Poor Girl’s Pasta)

    Thanks for letting me post on this lovely, lovely blog! Unfortunately, I don't have pictures - but I can update next time I make it.


    I first developed this recipe when I started my first job, had my first solo apartment and had to cook for one on a tight journalist's budget. I love fresh veggies but they can break the bank. So this allows you to incorporate whatever you have left over or whatever you use for your daily lunch.


    Purpose is to throw together whatever you have in your fridge and call it a gourmet, Italian meal. Make it your own.


    Ingredients:


    Whatever veggies you have in your fridge – red bell peppers, mushrooms, baby spinach leaves seem to work best

    Olive oil (3-4 tablespoons, depending on if you're making it for one or more)

    Pasta – mixing two different types is encouraged

    Few cloves of chopped garlic

    Italian seasonings: Onion (powder or chopped), basil, oregano, etc.

    A number of spoonfuls of parmesan cheese (or whatever white cheese you may have)

    Cooked Boca crumbles (optional, but one of my favorites!) or cooked bits of bacon (optional)

    1. Boil water for the pasta.
    2. In a saucepan, throw in about two tablespoons of oil olive, garlic, veggies and spices, and sauté. Add in Boca crumbles or bacon if so desire. Let cook for about 5-8 minutes, depending on temperature (and how much time you have).
    3. Cook pasta.
    4. Combine veggies with pasta, drizzle olive oil to liking. Top with cheese.
    5. Serve with garlic bread or a side salad if you want, but not necessary
    - Stacey Skotzko

    Monday, July 25, 2011

    Baked Macaroni and Cheese with Chicken and Broccoli

    Eureka! At last! Sweet sweet, blog-ready, macaroni perfection...


    Time and time again my mac and cheese has come out too spongy, too dry, too crispy, too flour-y, too... something. We've "suffered" through it with the help of Frank's Red Hot, but we shall suffer no more! Finally I've nailed down a recipe for creamy, gooey, delicious macaroni and cheese, and here it is for your enjoyment :) I'm glad to report that Frank stayed in the cupboard during dinner this evening.

    Total Cook Time: 1 hr
    Active Cook Time: 40 minutes
    Serves: 4-6

    Ingredients:
    • 2 small chicken breasts, chopped (I used some that were marinated in barbecue sauce... yummy!)
    • 1 glug olive oil
    • 2-3 c broccoli florets
    • 1/2 of a large white onion, chopped
    • 2 cloves garlic, chopped
    • 2 T four
    • 1 c chicken stock (fat free, low sodium)
    • 3 T unsalted butter
    • 2/3 lb elbow macaroni
    • 2 c milk
    • 2 c finely shredded sharp cheddar cheese (dairy or soy cheese)
    • 2 t salt

    Directions:
    1. Prepare macaroni according to directions on box. In the last 2 minutes of cooking the pasta, drop the broccoli into the boiling water and let it cook with the pasta.
    2. Heat olive oil in a pan over medium heat. Add onions, garlic and chicken. Saute 5-7 minutes until chicken is cooked and your whole house smells yummy...
    3. In a medium sauce pan, melt the butter over medium heat. Add the chicken stock and bring it to a boil, stirring constantly. It will thicken over 2-3 minutes.
    4. Add the milk to the sauce pan and bring it to a boil. Once boiling, stir in the cheddar cheese and remove from heat. It should turn into a nice creamy sauce instantly :) Stir in the salt for taste.
    5. Combine the pasta/broccoli, chicken/onions/garlic, and cheese sauce in a large baking dish and bake at 350 F for 25 minutes. (Honestly, you don't have to bake it... but I like the way baking it makes the cheese sauce set up).
    6. Let stand 10 minutes and serve.

    Saturday, July 23, 2011

    Bacon-wrapped Stuffed Chicken over Mushroom Risotto

    These two dishes were a good combo because once the chicken was in the oven, I could focus on the risotto, which is kind of a time-intensive dish to make. 

    Chicken Ingredients:
    • 4 chicken breasts
    • 1/2 c ricotta cheese
    • 1 package frozen spinach, thawed
    • 4 strips thick cut bacon
    • 4 toothpicks or 2 wooden skewers cut in half

    Directions:
    1. Preheat oven to 350 F.
    2. Place the spinach into a cloth, squeeze it until there's no liquid left in it. Butterfly cut the chicken breasts and lay them out opened on a cutting board. (To butterfly cut, stand the chicken breast up on its side and slice it almost all the way through. It will look like a heart-shape when you're done.)
    3. Combine ricotta, spinach, salt, pepper and garlic powder. Add a heaping spoonful of the mixture to each chicken breast.
    4. Fold the chicken breast around the stuffing and wrap it in bacon. Tuck in any loose ends and skewer it all together, then place on a baking tray.
    5. Once you've wrapped up all of your chicken breasts, pop them in the oven for half an hour and get started on the risotto.

    Risotto Ingredients:

    • 1 c Arborio Rice
    • 4 c chicken stock
    • 1/2 c finely chopped onion
    • 1 c chopped mushrooms
    • 3 cloves garlic
    • 3 T olive oil
    • 3 T freshly ground parmesan cheese

    Directions:
    Browning the risotto
    1. Add 1 T olive oil to a pan on medium heat. Saute mushrooms for 3-5 minutes, and set aside. 
    2. Saute onion and garlic in the remaining oil for 3-5 minutes, then add the dry risotto to the pan and brown for 2-3 minutes. 
    3. Add 1 c of chicken stock and stir constantly until the broth is absorbed. Then add 1/2 to 1 cup of broth at a time and stir constantly until the broth is again used up. This will take about 20 minutes. It's important to keep stirring and not just let it boil to allow the starch in the rice to break down and spread out.
    4. Once all broth is absorbed, add the mushrooms and parmesan cheese.
    5.  Layer the chicken over the risotto and enjoy!
     

    Thursday, July 21, 2011

    Shimp Linguine al Diablo

    This one can have as much or as little "devil" in it as you like and it's delicious either way. I was experimenting with a Bonnet hot pepper that I haven't tried before, so I only used half. Next time I'm going to do its name justice and use the whole damn pepper...

    Prep Time: 10 minutes
    Cook Time: 15 minutes
    Serves: 3-4

    Ingredients:
    • 1/2 lb linguine
    • 1/4 stick of butter
    • 1 glug of olive oil
    • 1/2 lb peeled raw shrimp
    • 1/4 of a small zuccini
    • a handful of broccoli
    • a few chopped mushrooms (crimini or baby bella)
    • 2 cloves chopped garlic
    • 1 can of diced tomatoes (I used "garlic and herb" flavored)
    • 1/2 c heavy cream
    • 1 dried hot pepper
    Directions:
    Look at all of that goodness just simmering together!
    1. Bring a pot of water to boil and add linguine. Cook 10-11 minutes.
    2. Melt butter and olive oil in a pan on medium heat. Add garlic and saute 1-2 minutes.
    3. Add veggies, saute 2 minutes.
    4. Drain some liquid off from the canned tomatoes, but leave about half of it in there. Add tomato and remaining liquid to pan. Add the cream and crumbled dried pepper. Stir.
    5. Add shrimp, cover and let simmer for 5 minutes (until pasta is done). Salt and pepper to taste.
    6. Drain pasta, remove saute contents from heat, and combine it into one big happy family.

    Chicken Noodle Soup (from scratch!)

    I brought this dish over to Casey & Travis' last night for dinner after work. It was fun/easy and totally from scratch! They raved of its deliciousness so I hope you enjoy :)

    2 lbs. bone in skin on chicken breast
    2 qt. Water
    1 carrot, diced
    1 celery stalk, diced
    1/2 yellow onion, diced
    1/2 tsp. cloves
    1/2 tsp. thyme
    1 bay leaf
    salt & pepper
    3 cups dry noodles


    Before I get started, I have to share with you that I searched the pasta aisle for literally 20 minutes just to find the right noodle. Finally, I spotted them, and "...the way you remember them" is absolutely correct. These noodles are thick and hearty and hold up well in a soup, regular egg noodles tend to break down and turn to mush. I snapped a visual so that when replicating you are sure to get the "right" noodle.

    Combine chicken breast and water in a large pot, bring to a boil. Skim the scum from the top of the water with a spoon. Once scum has been removed, reduce heat and add in the vegetables and spices. Cover and cook on low for approximately 1.5 hours or until the chicken meat is falling off the bone.

    Remove the chicken breasts and set aside to let cool. Meanwhile, place the dry noodles into the chicken stock and continue to cook on low. Once the meat is cool enough to handle, begin pulling the meat away from the bones, you'll find that this is extremely easy to do. Also remove any skin and cartilage that may be attached to the meat. At this point you can either shred the meat with your fingers or use a sharp knife to dice into small squares. I like the shredded chicken best, but it's up to you! Add the chicken back into the pot and your soup is complete!

    The excess soup can be frozen, refrigerated or just shared with a big group - just don't forget the saltines!

    Wednesday, July 20, 2011

    German Chocolate Cake (from scratch, because my brother and sister in law are too good to me!)

    My brother, John, and sister-in-law, Katherine, came in first place in my heart with my best birthday present this year! Obviously the girl who has everything needs a gift that's edible! German Chocolate cake is my fav, and I don't think I've ever had one this good!

    Notes From John and Katherine:

    "-I have found a great and delicious way to use the extra coconut/pecan icing leftovers is to pair them with some chocolate crepes :) yummo!
    -some recipes called for the coconut icing on the sides as well as top and in between slices, up to the cook's preference.
    -the amount of batter was enough for 3 thinner layers in a 9" pan.... recipe called for 2 layers, but we like the taste and look of the 3 layers (the more of that magic icing you can cram in the cake the better, my opinion!)....
    -we added a cup of mini choc chips to the batter"


    Here's the recipe they used from foodnetwork.com: German Chocolate Cake

    It goes a little somethin like this:

    German Chocolate Cake 

    Recipe courtesy Aliyyah Baylor


    Prep Time: 40 min
    Inactive Prep Time: 2 hr 15 min
    Cook Time: 1 hr 50 min
    Level: Intermediate
    Serves: 2 (9-inch) layer cakes or 24 cupcakes

    Ingredients

    • 4 ounces baker's chocolate (recommend: Baker's German Sweet Chocolate)
    • 1/2 cup water
    • 2 cups cake flour
    • 1 teaspoon baking soda
    • 1/2 teaspoon salt
    • 1/2 pound unsalted butter, room temperature
    • 1 teaspoon pure vanilla extract
    • 1 1/2 cups granulated sugar
    • 1/2 cup brown sugar
    • 4 eggs, separated
    • 1 cup buttermilk
    • Filling, recipe follows or whatever you prefer
    • Favorite chocolate frosting, for the sides

    Directions

    1. In a microwave safe bowl, add the chocolate and water and heat in a microwave or over a double boiler until melted. Stir until smooth and set aside. In a separate bowl, sift together the cake flour, baking soda and salt. Set aside.
    2Preheat the oven to 350 degrees F.
    In the bowl of a stand mixer, cream together the butter, vanilla extract, granulated sugar and brown sugar until light and fluffy. Scrape down the sides of the bowl. Add egg yolks 1 at a time, beating well after each addition. Blend in the melted chocolate. Add the flour mixture and buttermilk, alternating, until just combined.
    3. Add the egg whites to a small bowl and beat with an egg beater until stiff peaks form. Gently fold the whites into the batter until well incorporated.
    4. Pour the batter evenly into 2 (9-inch) cake pans or 2 (12 capacity) cupcake tins. Bake until a toothpick inserted into the center of the cake comes out clean, about 30 minutes for the larger cakes and 15 to 20 for the cupcakes. 5. Remove from the oven to a cooling rack and allow to cool completely before filling and frosting.
    6. To Assemble the German Chocolate Cake:
    • Put a cake layer on top of a serving plate and top with a generous layer of the caramel/pecan filling. Cover the frosting with another cake layer of and spread with the frosting. Top with the final layer and frost.
    7. Spread dark chocolate frosting (secret recipe), or your favorite chocolate frosting around the outside of the entire cake. Cut into wedges and serve.


    __________________________________________________________________

    Coconut Pecan Filling:

    • 1 1/2 cups evaporated milk
    • 5 egg yolks, slightly beaten
    • 1 cup granulated sugar
    • 1 cup brown sugar
    • 2 teaspoons vanilla extract
    • 1 cup butter
    • 2 1/2 cups flaked coconut
    • 2 cups toasted pecans

    1. Combine the evaporated milk, slightly beaten egg yolks, granulated sugar, brown sugar, vanilla and butter in a large saucepan or heavy pot over low heat. When the butter melts raise the heat to medium, stirring constantly. 2. The mixture will thicken after 10 to 12 minutes. Remove from the heat. Add the coconut and pecans and cool before frosting the cakes.


    Monday, July 18, 2011

    Say Say's Enchiladas

    Things that I love about this meal:
    • it's easy to make
    • it's well rounded
    • it's healthy (until you slather it with cheese and sour cream)
    • it makes great left overs

    Sarah Mapel made delicious enchiladas for me a few years ago and they've been a staple at my house ever since I bogarted her recipe. Of course nothing survives long periods of time in my kitchen with out evolving a little, so I've made my own adjustments.

    This is my first week in my new kitchen, and my old roommate's first week without me in her kitchen. Enchiladas were her first blog request :)

    Prep Time: 20 minutes
    Cook Time: 25 minutes
    Serves: 4

    Ingredients:
    • 6 large flour tortillas
    • 1 large can of enchilada sauce, I use "mild" and Joe hots it up with hot pepper sauce at the table
    • 3 boneless skinless chicken thighs OR 2 boneless skinless chicken breasts
    • 1 cup sharp cheddar cheese
    • 1 c long grain rice
    • 1/2 of a chopped green pepper
    • 1/4 of a thinly sliced vidalia onion

    Directions:
      1. Fill a medium sized sauce pan 2/3 of the way full with water and bring it to a boil. Carefully add the chicken (washed, whole) to the water. Let boil 10-15 minutes depending on the size of the pieces of chicken.
      2. In a small saucepan, combine 1 c rice with 2 c water. Bring to a boil over medium-high heat. Once it's fully boiling, cover it and drop the heat to super low for 15 minutes. Don't uncover it during this time, or I'll come to your kitchen and slap your hand with a spoon! When 15 minutes is up, turn it off and let is sit covered until you're ready to use it.
      3. Preheat oven to 350 F.
      4. When the chicken is cooked, dice it into small pieces or shred with with 2 forks.
      5. Layer a small amount of chicken, onion, pepper, and rice onto a tortilla. Don't over do it or you'll have bulging enchiladas that are too big to eat. There are worse problems happening in the world.


      6. Repeat step 5 with the remaining tortillas.
      7. Add a splash of sauce to a casserole dish, then start laying the enchiladas in.

      8. Pour the entire contents of the sauce can into the casserole dish, onto the enchiladas.

      9. Bake at 350 for 20 minutes.
      10. Add cheese to the top of the enchiladas and put it back in the oven with the heat turned off for another 5 minutes.
      11. Let stand 10 minutes before serving.
      12. Top with sour cream if you so desire :)

      Sunday, July 17, 2011

      Grill Out

      We just moved into a new apartment complex and there are grills available. After today I think we'll be sure to enjoy grilling out for the rest of the summer. Just a peek at what we had :)

      Grilled fresh pineapple slices- these stay warm for a while, so I put them on first.
      Casey's grilled bread- yummy! Made an awesome appetizer.
       

      Ribeye and Delmonico steaks with McCormick Montreal Steak Seasoning, and grilled zuccini


      We topped the steaks with Amish bleu cheese.

      All in all it was a really nice house warming picnic and a great way to end a long, hot weekend of moving!

      Thursday, July 14, 2011

      Semi-Homemade Ravioli


      This is my Wednesday night ode to Sandra Lee. I am notorious for throwing together whatever happens to be in my fridge. Living alone doesn't make it easy to stock a full fridge and cooking for one is a bit tricky sometimes.

      For this recipe I used pre-made ravioli/won ton squares that I found in the vegetarian/vegan section at Kroger. I had never used these before so I followed the recipe instructions on the packaging for the ravioli. They suggested making a filling of cooked spinach and ricotta cheese seasoned with salt and pepper. Because I was in a pinch I got crafty and decided to use a spinach dip I had in the fridge and mixed it with fresh grated Parmesan cheese for the filling. Here's the step-by-step:

      1. Preheat oven to 375.

      2. Place one ravioli square on a clean dry surface. Spoon 2 tablespoons of spinach mixture neatly into the center of the square.

      3. Dip your finger or a small brush into a glass of water and brust the outside rim of the ravioli square. You will feel the ravioli become gluey from the moistness of the water.

      4. Place a second square on top of the first and use a fork to press edges together. I found that in order to be sure that the filling doesn't ooze out, work one side at a time and pick the ravioli up as you go and handle delicately.

      5. Arrange completed ravioli on a baking sheet that has been lightly sprayed with non-stick. Brush top of ravioli with olive oil and place in oven for approximately 10 minutes or until lightly browned. I flipped them half way through just to be sure I wasn't burning them on one side, as baking ravioli was a new concept to me. They became a little more crispy than I would have liked, so next time I might experiment with dropping them in boiling water instead.

      6. Serve with red sauce for dipping or drizzle over like I did. Easy peasy.

      For the side salad I just topped chopped iceberg with sliced strawberries, cucumbers and crumbled Parmesan cheese. Drizzled with lite balsamic vinaigrette and you have a delicious summer salad. If I had some chopped walnuts or slivered almonds I would have thrown those in the mix for a good crunch, but alas, you work with what you have!

      This was a delicious and easy mid-week meal, hope you enjoy and feel inspired by my semi-homemade pinch meal. Have you ever done something different like using spinach dip for a ravioli filling? Let's hear about it!

      Wednesday, July 13, 2011

      Uova al Purgatorio, i.e. Eggs in Purgatory

      This is one of my favorite ways to use up what's left in my fridge for an easy and filling meal, perfect for breakfast, lunch or dinner! Since this was my dinner, I added ground turkey to my sauce, but for a lighter dish you can nix the extra protien and add fresh vegetables like peppers, spinach or fresh basil.

      You'll find that I'm not very good at written recipes, I should probably take more pictures, but I'm easily distracted. Here's the step-by-step sans visual aides:

      1/2 Pound ground turkey
      2 Cloves garlic, minced
      2 Cups red sauce
      4 Eggs
      Salt & Pepper
      Pasta of your choice
      Fresh grated Parmesan cheese

      1. Brown turkey with minced garlic in a sautee pan, I used my iron skillet.

      2. Reduce heat to medium low, add red sauce and simmer.

      3. Use a spoon create four wells in the sauce and crack a raw egg into each. Top with fresh cracked salt and pepper.

      4. Cover and cook on low until egg whites have cooked through completely and yolks reach desired level of firmness. Leaving them a bit overeasy gives the dish a nice creaminess.

      5. Spoon sauce and egg over al dente pasta and cover with fresh grated parmesan cheese.

      Wondering where this delicious meal finds its origins? Well that's up for debate, but many like to believe that it arose as a tribute to the great Italian poet Dante as a reference to his description of Purgatory in The Divine Comedy. However, it is a more widely accepted that the dish came as a result of popular vegitarian Italian diets as a way to combine the delicacy of eggs with the simplicity of traditional red sauce. Either way, the combination is "divine".

      Monday, July 11, 2011

      Lasagna

      Lasagna has always been a classic at my house. Sometimes I throw in the occasional surprise ingredient, but by and large I stick with the, "If it ain't broke," rule here. This is another one that I suspect my roommate will be checking the blog for once I move out, so I'm putting up detailed pictures :)

      Prep Time: 20 minutes
      Cook Time: 1 hr 15 min
      Serves: 5-6 (or 1 and left overs!)

      Ingredients:
      • 1 lb lean ground beef
      • 1 lb ground sausage
      • 2 c shredded mozzarella cheese
      • 1 16 oz can of Hunt's Garlic and Onion red sauce
      • 1 chopped onion (optional)
      • 4 cloves chopped garlic (optional)
      • salt and pepper to taste
      • 10 lasagna noodles prepared according to the directions on the box (I never use the ready to bake kind, I think they come out funny... so it's up to you but I prefer to boil them ahead of time)
      Directions:
        1. Bring a large pot of water to boil and heat a skillet on medium.

        2. Cook noodles according to directions on the box. Simultaneously brown the sausage and beef combo in the skillet. Drain the excess fat off of the meat when it's all the way brown. Salt and pepper to taste.

        3. Preheat the oven to 350 F while you put the lasagna together. Slosh a few spoonfuls of sauce around in the bottom of a casserole dish. This will keep any noodles from sticking to the bottom.

        4. Lay 3 noodles side by side in the bottom of the dish. The 10th noodle is in case any other noodles break... Usually they don't, but lasagna noodles come in boxes of 20, so I'm pretty sure you're supposed to make one extra and eat it.

        5. Add 1/3 of the meat to the noodles, spread evenly.

        6. Add about 1/3 of your remaining sauce to the mix.

        7. Add 1/3 of the mozzarella cheese. (This picture didn't come out... but you get the point)

        8. Repeat 4-7 two more times.

        9. Cover with aluminum foil and bake for 45 minutes. Then uncover and bake for 15 more minutes. Let stand 15 minutes before serving.